

Create a Pirate’s Treasure Chest: Imaginative Play Meets History
Want to combine fun and learning for kids? Build a pirate treasure chest together! This hands-on activity blends crafting with history, teaching kids about pirates while boosting skills like problem-solving and teamwork. Here’s what you’ll need and how to get started:
- Materials: A cardboard box (like a shoebox), kraft paper, glue, markers, scissors, and decorations (plastic gems, stickers, ribbons).
- Steps: Reinforce the box with paper, draw wood grain patterns, add pirate symbols, and create a latch or lock.
- Safety Tips: Use child-safe tools, supervise young kids, and avoid small items for kids under 3.
- Educational Twist: Teach pirate history (like the Golden Age of Piracy) and introduce pirate lingo ("Ahoy", "Matey"). Add treasures like DIY gold coins, maps, and scrolls to make it more engaging.
This project encourages creativity, introduces historical concepts, and provides hours of playtime fun. Perfect for kids aged 3-12, with age-appropriate tasks for everyone.
Materials and Preparation
To get started, you'll need some everyday supplies that you can easily find at home or at a local craft store. Here's a breakdown of the materials you'll need and a few tips to ensure your project is both fun and safe.
Basic Materials
Start with a sturdy cardboard box - a shoebox (around 12x8x4 inches) works great, but cereal boxes or small shipping boxes work too. Cover the box with 2–3 layers of brown or kraft paper using white school glue or glue sticks to hold everything in place.
For decoration, grab some washable markers in brown, black, and gold to draw wood grain patterns and pirate symbols. Use child-friendly scissors for simple cuts, and keep regular scissors on hand for more detailed work. Clear tape or masking tape will help secure paper edges and strengthen the box. A ruler will come in handy for drawing straight lines and evenly spacing any decorative details.
These materials will serve as the base for creating a pirate treasure chest that’s perfect for sparking creativity and a bit of historical fun.
Extra Decorating Supplies
Take your treasure chest to the next level with some extra decorations. Plastic gems, stickers, glitter glue pens, and acrylic paint pens are perfect for adding pirate-themed details like skulls, crossbones, or maps.
You can also use ribbons in red, black, or gold to accent the edges or as decorative straps. Glue dots are a quick and easy way to attach embellishments securely. To make the chest feel like a real pirate's bounty, fill it with coins, jewels, or other treasures.
Safety Guidelines for Adults
Safety is key when working on this project, especially with children. Adults should handle hot glue guns to avoid burns, keeping kids at a safe distance. Have a bowl of cool water nearby just in case.
When kids are using scissors, even the child-safe kind, make sure they cut away from their bodies and keep their fingers clear of the blades. For children under 5, consider pre-cutting materials to avoid accidents.
Be cautious with small decorative items like plastic gems and beads, as they can pose a choking hazard for kids under 3. Store these items in separate containers and supervise their use closely.
Prepare your workspace by covering the surface with newspaper, a plastic tablecloth, or kraft paper to protect it and make cleanup easier. A well-lit area will help kids see their work clearly, and keeping a damp cloth nearby will make it easy to clean up spills as they happen.
Step-by-Step Instructions for Building the Treasure Chest
With all your materials ready, it's time to turn that ordinary cardboard box into a pirate's treasure chest - perfect for sparking imaginative adventures. These instructions are simple enough for kids to follow, helping them develop their crafting skills along the way.
Building the Chest
Start by reinforcing the box with kraft paper. Spread a thin layer of white glue on one side of the box, then press the kraft paper down, smoothing out any air bubbles. Repeat this for each side, slightly overlapping the edges for a clean finish.
Once the paper has dried, create a hinged lid effect. If you're using a shoebox, the lid works perfectly as is. For other boxes, cut along three sides of the top, leaving one long edge attached to act as a hinge. Use a ruler to measure and mark your cuts for accuracy - aim for about 1 inch from the back edge.
Next, draw wood grain patterns to give the chest a realistic wooden look. Use brown and black washable markers to make wavy lines that run the length of each panel. Vary the thickness of the lines, and add knots or darker spots to mimic the texture of real wood.
Add metal corner details to make the chest look sturdier. Use a black marker to draw rectangular shapes on each corner, imitating the iron bands that reinforced actual treasure chests. These little touches make the chest feel more authentic, as if it could have endured the rough seas.
With the structure complete, you're ready to move on to decorating and personalizing your pirate chest.
Adding Decorations
Paint or color the chest using your chosen supplies. Acrylic paint pens are great for adding pirate symbols like skulls, crossbones, or treasure maps. For younger kids, washable markers or crayons are easier to manage. Let them have fun adding their personal flair!
Create a simple latch or lock using cardboard scraps. Cut out two small rectangles - attach one to the front of the chest and the other to the lid using clear tape or glue dots. To make it look more realistic, draw a keyhole with a black marker. You can even cut a small key shape from cardboard and tie it to the chest with string.
Line the inside of the chest with tissue paper or felt to give it a luxurious feel. Cut the material to fit the bottom and sides, then secure it with glue dots or a small amount of white glue. This step adds a soft surface for your treasures and makes the chest look complete.
Finally, add finishing touches like plastic gems, stickers, or even small seashells. Place these decorations around the corners and latch to highlight those areas. These little details make the chest stand out and add to the pirate theme.
Age-Appropriate Decorating Activities
Adjust the decorating steps based on your child's age and abilities:
- Ages 3-5: Encourage them to use stickers and large crayons on pre-drawn shapes.
- Ages 6-8: Let them draw their own pirate symbols and experiment with glitter glue or simple cutting tasks.
- Ages 9-12: Older kids can take charge of the design, handle precise cuts, and even research pirate symbols to add an educational twist.
Older children can also help younger siblings by guiding them through the process or suggesting ideas for the chest's design. They might enjoy measuring and spacing decorative elements or planning the chest's overall look.
To make the activity even more engaging, ask kids to imagine the story behind their chest. Who might have owned it? What adventures has it been on? Adding this storytelling element turns crafting into an imaginative journey, setting the stage for more pirate-themed fun later on.
Filling the Chest with History-Based Treasures
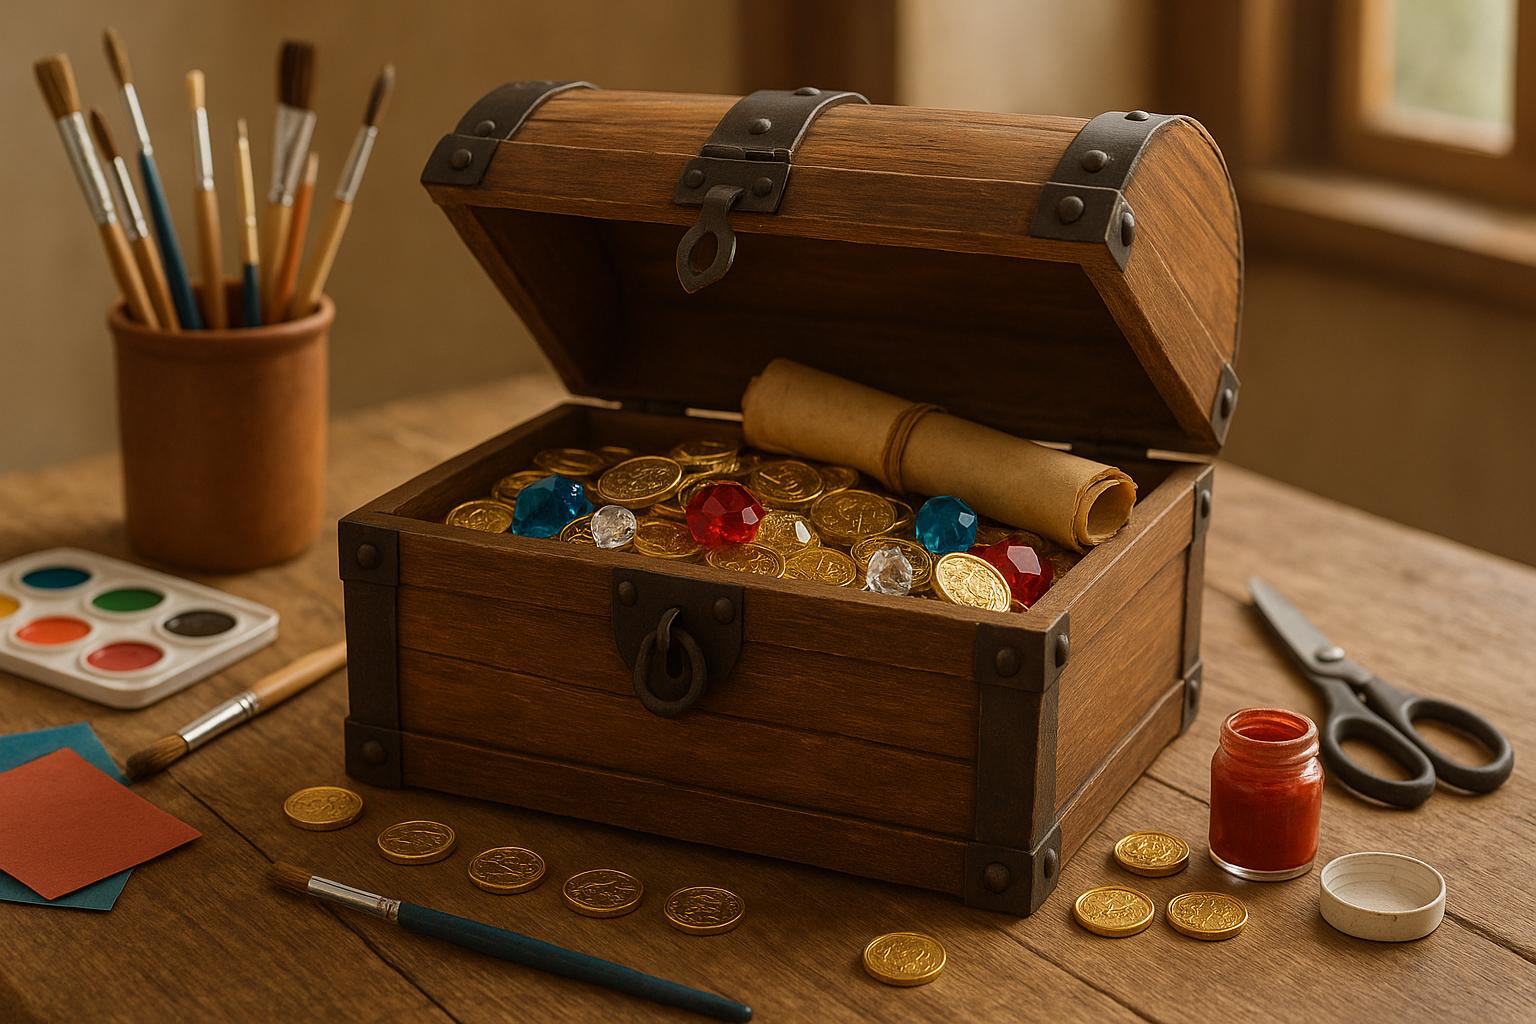
Now that your pirate chest has that authentic look, it’s time to fill it with treasures inspired by maritime history. The best treasures combine fun and learning, giving kids a glimpse of what pirates actually valued during the Golden Age of Piracy (1650–1730). These DIY ideas will spark curiosity about the past while keeping the pirate adventure exciting. Plus, they’re a great way to weave history lessons into playtime.
Treasure Ideas
Start with beaded necklaces and bracelets made from colorful wooden or plastic beads. Historically, beads were prized trade items, exchanged in ports around the world. Kids can string their own combinations while learning about their historical significance.
Next, make replica maps using brown paper bags or parchment paper. Crumple the paper, smooth it out, and brush it lightly with coffee or tea for an aged look. Draw islands, mark treasure spots with an “X,” and add a compass rose. Maps were essential for pirates, often determining whether they found safe harbor or got lost at sea.
Another idea is to craft rolled scrolls from brown paper, inscribed with pirate codes. Real pirates followed strict codes of conduct to maintain order during their long voyages. These scrolls can serve as a fun way to introduce the idea of teamwork and rules on pirate ships.
Finally, no pirate adventure is complete without coins. Let’s dive into how to make your own gold pieces for an extra touch of authenticity.
Making Gold Coins
Air-dry clay coins are a fun and tactile way to bring pirate treasure to life. Amanda Eldridge from Barley & Birch shared a detailed method in March 2023 that’s perfect for this. Roll out air-dry clay to about 1/4 inch thick, then cut out circles with a cookie cutter or bottle cap.
"Whether you're making leprechaun gold for St. Patrick's Day or pirate treasure for backyard adventures, these air-dry clay gold coins are a creative art process for kids and make fantastic homemade play props."
– Amanda Eldridge, Barley & Birch
Before the clay dries, press household items like forks, spools, or bottle caps into the surface to add texture. Once dry, paint the coins with gold tempera or acrylic paint. This hands-on project teaches patience and results in a durable treasure kids will love.
If you’re short on time, you can wrap cardboard circles in gold foil or use chocolate coins from local stores. While these are quicker options, the air-dry clay coins offer a more engaging craft experience.
For an extra history lesson, explain that pirates often used Spanish "pieces of eight" for trade. This helps kids understand how currency worked differently in the 1600s and 1700s.
Using Play Money
DIY play money adds a layer of realism and teaches basic math skills. KiwiCo suggests using green felt cut into rectangles for paper money and round wooden pieces or cardboard circles for coins. Kids can draw numbers on the coins to assign different values.
"Play money is something that is so easy to make, but has so many possibilities for children. From math games to pretend market, this money has been used for it all in our house."
– KiwiCo
Include familiar symbols like dollar signs ($) to make the activity relatable. You can even create different denominations using various colors - green for dollars, silver for coins, and gold for pirate currency. This encourages counting and sorting while keeping the pirate theme alive.
Combine the play money with your handmade coins to show how pirates collected currency from different countries during their travels. This diversity in their treasure chests mirrors the variety of cultures they encountered on the open seas.
These history-based treasures transform simple craft materials into tools for exploring maritime adventures and cultural exchange. Every item becomes a gateway to stories about the lives of seafarers from centuries ago.
sbb-itb-6d35b6a
Adding Pirate History to Playtime
Once you've gathered your history-inspired treasures, it's time to bring the Golden Age of Piracy to life! Using simple pirate facts from 1650–1730, you can create adventures that teach kids about maritime exploration, seafaring life, and even how different cultures influenced piracy. These playful activities make history come alive in a way that's both fun and educational.
Teaching Pirate Words
Pirate lingo is not only fun but also a great way to expand kids' language skills. Introduce words like "Ahoy", "Avast", and "Matey", and explain their meanings. For instance, "Ahoy" is a greeting, "Avast" means "stop" or "pay attention", and "Matey" is what pirates called their friends. You can even share that "grog" was a popular pirate drink.
Try swapping everyday phrases with pirate talk during playtime. Instead of saying "Hello", greet each other with "Ahoy there!" or call your little adventurers "Matey." These small changes not only make the experience more immersive but also open up discussions about how language changes over time and varies among different groups.
These vocabulary lessons are a perfect lead-in to treasure hunts or role-playing games. Kids love using special words that make them feel like real pirates. Plus, it’s a sneaky way for parents to turn playtime into a mini history and language lesson.
Telling Pirate Stories
Pirate stories are packed with adventure, teamwork, and fascinating characters. Share tales of legendary pirates like Blackbeard, Anne Bonny, Captain Kidd, Mary Read, Grace O'Malley, and Ching Shih. These stories not only entertain but also give kids a glimpse into life aboard a pirate ship, where every crew member - from the carpenter to the cook - played a critical role.
The stories of female pirates like Anne Bonny and Mary Read are especially engaging, showing kids that daring adventures weren’t just for men. Use these tales to highlight the importance of teamwork and fairness, as many pirate crews followed codes that emphasized these values. For example, pirates often shared their loot equally and considered supplies like food, lumber, and cloth as valuable as gold.
You can even tie in a geography lesson by pointing out pirate hotspots on a map. Pirates sailed across the globe, from the Mediterranean Sea, where the ancient Phoenicians are considered the first known pirates, to the Caribbean and beyond. These stories can inspire treasure hunt clues and navigation challenges, blending history with hands-on fun.
Setting Up a Treasure Hunt
Treasure hunts are the perfect way to combine problem-solving, history, and a bit of adventure. Start by creating an aged map and marking your home or yard with clues. Pirates were always on the lookout for hidden coves and secret hideouts, and your little adventurers can do the same!
Write clues that incorporate pirate facts. For instance, you might say, "Where the ship’s cook would prepare grog, look for your next clue near something hot", leading them to the kitchen. Or, "Pirates needed fresh water for their journeys - check where we keep ours cold", pointing to the refrigerator.
Include compass directions in your clues, like "Take five steps north toward the big tree", to teach basic navigation skills. To make the experience even more meaningful, attach a note to the treasure chest reminding kids that true pirate greatness comes from their bravery and teamwork, not just the treasure itself.
These treasure hunts are perfect for birthday parties, rainy days, or outdoor play. They encourage kids to stay active, think critically, and learn a little history - all while having a blast. Plus, the excitement of solving clues and discovering treasure will keep them coming back for more, eager to explore new challenges and locations.
Helpful Tips for Parents and Teachers
To make your pirate treasure chest project even more engaging, tailor the activity to your child’s age and incorporate creative ideas that tie in historical learning. By aligning the project with their abilities and interests, you can create a fun and educational experience.
Adjusting for Different Ages
Preschoolers (ages 3-5) thrive with simplified activities that prioritize fun over precision. Use pre-cut cardboard boxes and let them decorate with large foam stickers, finger paints, or thick brushes. Avoid small items like beads, which could be choking hazards, and instead provide oversized embellishments and large play coins for safe, creative fun.
Elementary-aged children (ages 6-9) can handle more detailed tasks. They might enjoy gluing metallic accents, drawing wood grain patterns, or adding simple locks. This is also a great opportunity to teach basic measuring skills, like cutting decorative paper strips to specific lengths.
Older children (ages 10+) can take on more advanced aspects of the project, such as cutting wood, assembling hinged lids, or attaching hardware. Encourage them to research authentic pirate chest designs and incorporate historically accurate details for a deeper learning experience.
This hands-on project also helps children practice counting and measurement skills as they organize treasure pieces and identify numbers on play coins.
Using Global Sprouts Resources

For an extra layer of learning, consider using Global Sprouts subscription boxes to enhance your pirate chest project. These boxes, designed for children ages 2-6, include curated activities, crafts, books, and artifacts from different cultures. At $49.99 per box, they provide ready-to-use materials that pair well with pirate-themed activities.
For example, a Global Sprouts box might include a map-making kit that teaches how explorers from various cultures navigated the seas. It could also introduce maritime vocabulary from different languages, helping kids see piracy and ocean exploration as global phenomena that connected civilizations.
The storybooks included in the boxes offer adventure tales from around the world, perfect for pirate storytelling sessions. Instead of focusing solely on Caribbean pirates, these stories can introduce children to sea adventurers from Asia, Africa, and beyond.
Additionally, these resources provide language-learning opportunities that fit naturally into pirate-themed lessons. Kids can learn to say words like "treasure" or "ship" in different languages, blending imaginative play with real-world education.
Expanding the Play Experience
Once the treasure chest is complete, keep the excitement alive with extended play activities. Dress-up sessions are a great way to immerse children in the pirate world. Help them make pirate hats from newspaper, eye patches from felt, or bandanas from fabric scraps. These simple costume pieces bring their pirate characters to life.
Themed treasure hunts are another way to keep kids engaged. Create hunts with varying difficulty levels: picture clues for younger children, written riddles for those who can read, and compass-based navigation challenges for older kids.
Encourage dramatic play sessions where children can invent their own pirate adventures. They can create characters with backstories, plan imaginary voyages, and solve challenges their pirate crew might face. This kind of role-playing fosters storytelling skills and sparks historical curiosity.
For group settings like classrooms or parties, assign roles to encourage teamwork. Set up activity stations so kids can rotate through tasks based on their interests. If the activity starts to feel too long, break it into shorter sessions with clear goals, like finishing the chest or completing a treasure hunt. Celebrate milestones along the way to keep motivation high.
To keep energy levels up, add movement breaks - like searching for "hidden" craft supplies - and let kids choose materials to give them a sense of ownership over their creations. These small adjustments can make the project more engaging and enjoyable for everyone.
Conclusion: Learning Through Play
Making a pirate's treasure chest combines elements of history, imagination, and hands-on learning into one exciting project. It’s a fun way to introduce kids to historical ideas while keeping them engaged and entertained.
But this activity goes beyond the craft itself. As kids design their treasure chests and fill them with items inspired by history, they start to separate pirate myths from real historical events. They also get to practice map-reading, use math skills, and expand their vocabulary through maritime tales. Plus, it’s a great way to connect with other subjects, like improving reading comprehension through pirate-themed stories.
Even more meaningful, this project creates opportunities for families to bond. Working together on something creative encourages a sense of adventure and discovery, all while sparking curiosity about different times and places.
Through activities like this, children not only develop practical skills but also gain a lasting interest in history. The pirate's treasure chest becomes a stepping stone to deeper exploration, encouraging critical thinking, research, and a broader understanding of the world as they grow.
FAQs
How can I make the pirate treasure chest activity educational for kids of different ages?
You can turn the pirate treasure chest activity into an educational experience by tailoring it to different age groups. For younger children, focus on engaging their senses - have them explore the 'treasures' by identifying shapes, colors, or textures. You could also introduce counting by asking them to count coins or gems as part of the fun.
For older kids, you can step it up a notch with activities that involve basic math, like calculating the value of the treasure. Bring in some geography by discussing famous pirate routes or landmarks. To add even more depth, share intriguing historical tidbits about pirates and maritime exploration. This way, the activity becomes an exciting mix of fun and learning.
How can I make learning about pirate history fun and engaging for kids during playtime?
You can turn pirate history into an adventure for kids by blending creative play with engaging, hands-on activities. Dive into storytelling or role-playing as legendary pirates to ignite their imagination. Activities like crafting treasure maps, decorating a pirate chest, or building mini ships can make history feel like an exciting journey.
Take it up a notch by organizing a scavenger hunt with "hidden treasures", weaving in simple facts about pirates and maritime exploration along the way. Singing lively pirate songs or discussing topics like navigation and sea life adds an educational twist to the fun. These activities not only spark creativity but also introduce kids to the captivating world of pirate history.
How can I make sure younger kids stay safe while crafting and decorating the pirate treasure chest?
To ensure younger children stay safe while crafting, close supervision is key. Show them how to use tools and materials properly before they dive in. Stick to non-toxic and age-appropriate supplies, steering clear of small parts that could be choking hazards for kids under 3. If paints or adhesives are involved, make sure the area is well-ventilated. Encourage handwashing once the activity wraps up, and if they have any cuts or scrapes, cover them up beforehand. These easy steps can help keep the experience both enjoyable and secure!